Work Zone Signs for Sale: Know What You’re Buying
Why Work Zone Signs Are Critical for Australian Road Safety
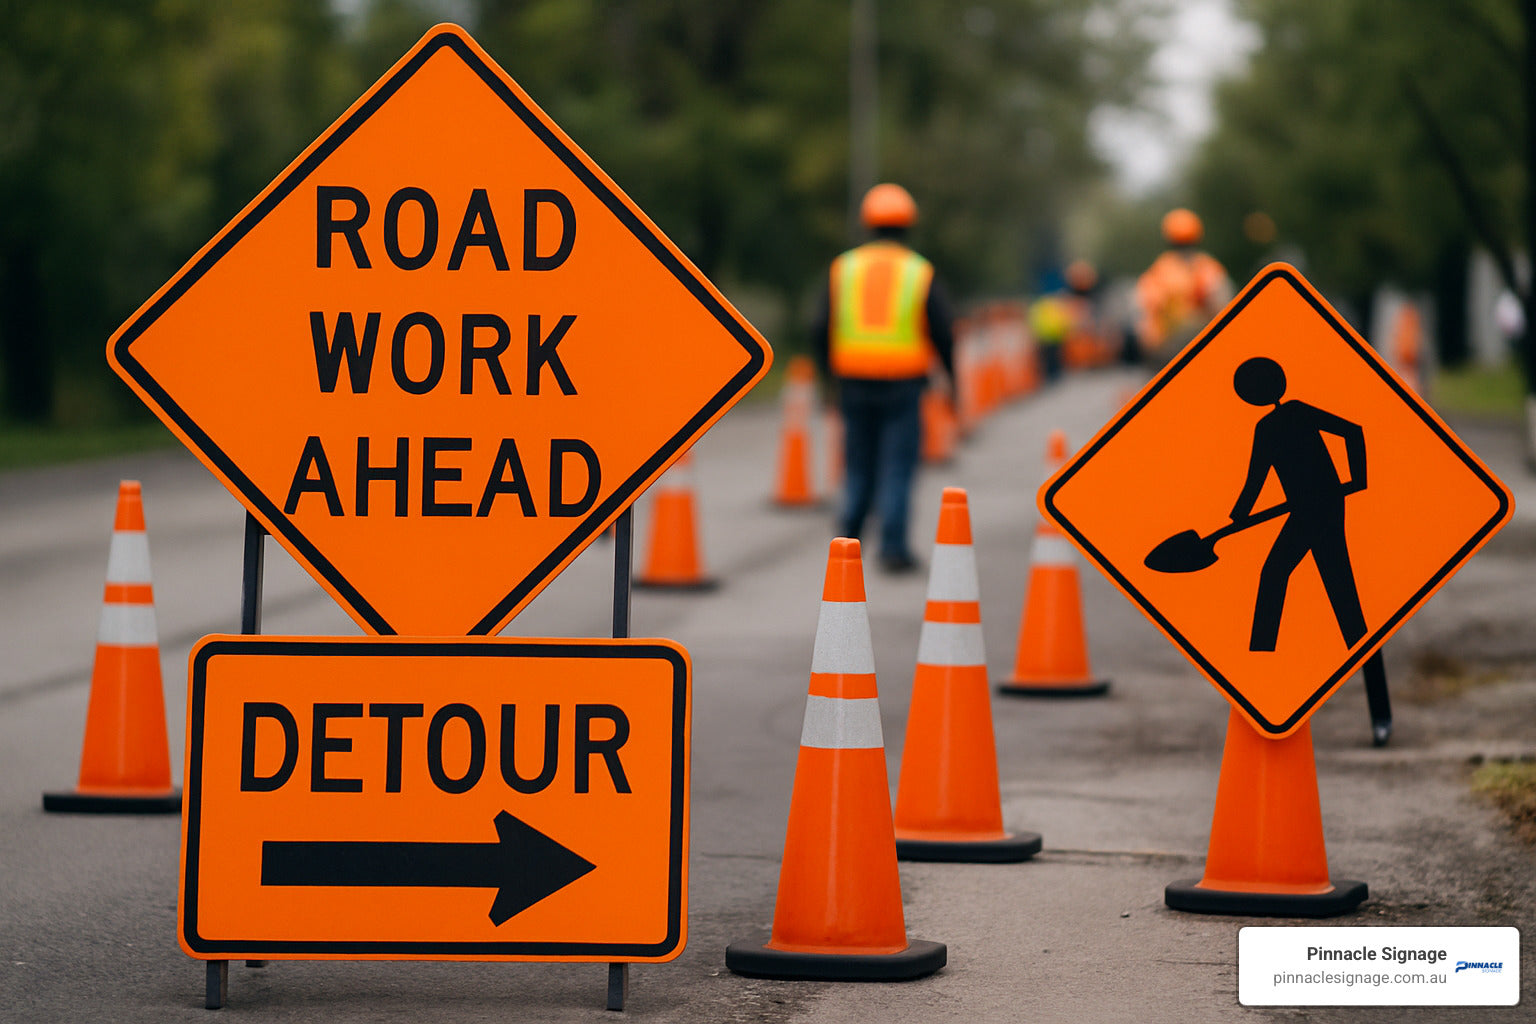
Work zone signs are temporary traffic control devices that guide motorists and protect crews during construction, maintenance and utility works. Their high-visibility orange background and bold black legends instantly tell drivers that normal road conditions have changed.
Key characteristics of quality work zone signs
- Colour: bright orange with black text and symbols
- Function: warn of hazards, lane shifts and reduced speeds
- Placement: advance warning, transition, activity and termination areas
- Materials: rigid aluminium with retro-reflective sheeting for night visibility
- Compliance: manufactured to relevant Australian Standards
Thousands of projects—from multi-lane freeway upgrades to short-term kerb repairs—occur on Australian roads every year. Each introduces new risks to both drivers and workers. Clear, consistent signage is the first line of defence against rear-end collisions, side-swipes and costly delays.
Safe Work Australia stresses that effective traffic management, including appropriate signage, is essential for protecting workers near moving vehicles. When motorists receive timely, unambiguous instructions, they can slow down, merge early and pass through the site safely.
Pinnacle Signage manufactures work zone signs built to withstand Australian conditions, helping contractors, councils and utility providers keep every project moving without compromising safety.
The Anatomy of a Work Zone Sign: Why Colour, Shape, and Size Matter
When you see that familiar orange sign ahead, your brain immediately knows something's happening on the road. That instant recognition isn't accidental—it's the result of carefully designed elements working together to keep everyone safe.
Work zone signs are engineered with three critical functions in mind: worker protection by alerting drivers to personnel near the roadway, road user guidance through modified traffic patterns, and safety communication that delivers clear, immediate information about hazards ahead.
The Science Behind Orange
There's a reason work zone signs aren't painted blue or green. That bold high-visibility orange colour is scientifically chosen for maximum impact. Orange cuts through visual clutter like nothing else, standing out against bitumen, concrete, vegetation, and sky. Combined with black text and symbols, this colour combination creates the sharp contrast your eyes need to spot and read signs quickly—even when you're travelling at highway speeds.
Over decades of use, orange has become the universal language of caution. When drivers see it, they instinctively know to slow down and pay attention. It's become so embedded in our driving culture that spotting orange in your peripheral vision triggers an automatic safety response.
Shape Matters: Diamond vs Rectangle
The shape of a work zone sign tells you exactly what type of information you're about to receive. Diamond-shaped signs serve as warnings, alerting you to immediate hazards like workers ahead, uneven lanes, or construction equipment. These demand your immediate attention and often require you to adjust your driving.
Rectangular signs, on the other hand, provide information and guidance. They tell you about lane closures, detour directions, speed limit changes, and when you've reached the end of the work zone. Think of diamonds as "heads up!" and rectangles as "here's what you need to know."
Size and Speed Correlation
Work zone signs come in two standard sizes: 36 inches and 48 inches in height. The choice isn't random—it's all about giving drivers enough time to read and react safely.
On faster roads, you need larger signs because drivers are covering more ground per second. A 48-inch sign gives you that extra visibility distance that can mean the difference between a smooth merge and a dangerous situation. These larger signs typically require two poles for proper support, which affects both installation time and transport logistics.
For lower-speed urban work zones, 36-inch signs often do the job perfectly. They're easier to handle, need just one pole for mounting, and are more cost-effective for shorter-duration projects. The key is matching the sign size to both the traffic speed and the complexity of the message you're trying to communicate.
Understanding these design principles helps ensure your work zone signage meets Australian Standards while providing the clearest possible communication to road users. For more insights into road construction signage, have a look at our guide on Road construction traffic signs explained (without driving you crazy).
Built to Last: Materials and Reflectivity in Work Zone Signs
Australian roads – from the humid Top End to the frosty Snowy Mountains – demand signs that stay readable and upright in all weather. Choosing the right materials from the outset avoids costly replacements and, more importantly, keeps everyone safe.
Substrate materials that stand up to the elements
- Aluminium is the industry mainstay. A 2 mm, sign-grade alloy resists corrosion, remains lightweight for quick installation and is thick enough to hold its shape when trucks roar past.
- Steel versions appear on a few sheltered, well-lit sites, but extra weight and susceptibility to rust make them less popular for roadworks.
- Polycarbonate components (for corner pockets or brackets) add impact resistance and UV stability without adding bulk.
Reflective sheeting: the night-time lifesaver
At dusk or in driving rain, reflectivity is what alerts a driver in time to react. The three common grades are:
- Engineer-grade – economical and effective up to roughly 150 m; suited to well-lit suburban streets.
- High-intensity prismatic – visible to around 300 m; ideal for arterial roads and regional highways.
- Diamond Grade – the premium choice, returning maximum light to the driver and meeting the strictest Australian requirements for high-speed or high-risk sites.

Why durability isn’t optional
A bent pole or a faded legend isn’t just unsightly – it compromises the entire traffic management plan. Quality substrates matched with the right sheeting, wind-rated fittings and anti-kiting straps ensure your work zone signs do their job for the full length of the project, whether that’s a weekend outage or an 18-month highway duplication.
For more detail on danger signage around active works, see our guide on Essential danger signs for work in progress areas.
Decoding the Message: Common Types of Work Zone Signs
When you're setting up a work zone, choosing the right signs isn't just about grabbing whatever's available. Each type of work zone sign serves a specific purpose in keeping everyone safe and traffic flowing smoothly.
Think of your work zone signage as a conversation with drivers. Warning signs are like tapping someone on the shoulder to say "heads up, something's coming." Regulatory signs are the firm but fair instructions that carry legal weight. Guide signs act like a helpful mate giving directions, while information signs fill in the details drivers need to understand what's happening.
Understanding these categories helps you create a complete communication system that guides drivers safely through your work area from start to finish.
For a comprehensive overview of construction traffic signage, read our detailed guide: Construction traffic signs 101: what every driver should know.
Advance Warning Signs
These are your first line of communication with approaching drivers. They're placed well ahead of the actual work zone to give people time to process what's coming and adjust their driving accordingly.
ROAD WORK AHEAD is your primary advance warning sign. It's the equivalent of a polite "excuse me" that gets drivers' attention and starts them thinking about slowing down and being more alert. The placement distance depends on traffic speed—faster roads need more warning distance.
DETOUR AHEAD gives drivers a chance to consider their options. Some might choose to take a different route entirely, which actually helps reduce congestion in your work zone. It's about giving people choices before they're committed to your traffic pattern.
WORKERS AHEAD is perhaps the most important warning sign you'll use. It specifically alerts drivers that there are people working in or near the roadway. This isn't just about speed—it's about awareness and the extra care needed when human lives are at stake.
Transition and Activity Area Signs
Once drivers reach your work zone, these signs take over to guide them through the actual changes you've made to normal traffic flow.
LANE CLOSED signs do the heavy lifting when it comes to traffic management. They tell drivers exactly which lane is affected and help them merge safely into open lanes. Proper placement prevents the aggressive last-minute merging that can cause accidents.
MERGE signs provide specific direction for lane changes. They're particularly important on multi-lane roads where drivers need clear guidance about where to go next.
SHIFTING LANES warns drivers that the temporary lane configuration might not match the permanent pavement markings they're used to. This prevents confusion and helps maintain smooth traffic flow.
UNEVEN LANES alerts drivers to surface irregularities that could affect vehicle handling. This is especially important for motorcyclists and drivers of lower vehicles who might be more affected by surface changes.
SHOULDER DROP OFF warns of hazardous edge conditions where the shoulder surface is significantly lower than the travel lane. This prevents dangerous situations where drivers might accidentally leave the roadway.
Regulatory and Guide Signs
These signs carry the authority and provide the specific directions that keep your work zone operating legally and efficiently.
Reduced speed limits establish temporary speed restrictions through work zones. These aren't suggestions—they carry the same legal weight as permanent speed limit signs. Proper speed management is crucial for both worker safety and traffic flow.
END ROAD WORK signals the return to normal traffic conditions and the end of work zone restrictions. It's the "all clear" that lets drivers know they can resume normal driving patterns.
PILOT CAR FOLLOW ME guides drivers through areas where normal traffic flow isn't possible. This might be single-lane alternating traffic situations or complex detours where drivers need active guidance to steer safely.
Each of these sign types works together to create a comprehensive communication system that keeps everyone safe while maintaining traffic flow through your work zone.
The Rules of the Road: Placement, Standards, and Compliance for Work Zone Signs
Getting work zone signs in the right place at the right time isn't just good practice—it's a legal requirement that could save lives. In Australia, these requirements create consistency across states and territories, so drivers know what to expect whether they're navigating roadworks in Sydney or Perth.
Temporary Traffic Control (TTC) Zones
Think of every work zone as having four distinct personalities, each needing its own signage approach. The advance warning area is your early messenger, letting drivers know what's coming up ahead. The transition area becomes the helpful guide, smoothly directing traffic through lane changes and closures. The activity area includes both the buffer space that protects workers and the actual work space where the magic happens. Finally, the termination area is like a friendly wave goodbye, returning traffic to normal conditions.
Understanding these zones helps you plan comprehensive signage that addresses driver needs throughout the entire work zone experience. It's not just about placing signs randomly—each zone serves a specific purpose in the overall safety system.
For detailed information about Australian Standards for safety signage, visit our comprehensive guide: Understanding Australian Standards for Safety Signs.
Strategic Setup: Where and How to Place Your Work Zone Signs
Advance warning area placement varies dramatically depending on where you're working. On quiet urban streets, you might place signs just 100 metres ahead of the work zone. But on highways where cars are travelling at 100 km/h or more, you'll need to position those same signs up to 800 metres in advance. It's all about giving drivers enough time to process the information and react safely.
Transition area tapers require the most careful planning. This is where you're asking drivers to change lanes or merge, often while they're still processing what's happening ahead. The length of these tapers isn't arbitrary—it depends on how fast traffic is moving and how much lateral movement you're asking drivers to make. A gentle merge works better than a sharp squeeze.
The activity area buffer space creates a safety margin between your workers and moving traffic. Signs in this area focus heavily on worker safety and might include variable message signs that can adapt to changing conditions throughout the day.
Termination area signage helps drivers transition back to normal traffic patterns. That END ROAD WORK sign isn't just a formality—it's typically placed 100 metres beyond the last work activity to clearly signal when work zone restrictions no longer apply.
Sign spacing must account for how quickly drivers can process information. Place signs too close together, and you'll overwhelm drivers with information overload. Space them too far apart, and drivers might forget what they've just read. Higher speeds require greater spacing between consecutive signs to give drivers time to absorb each message.
Mounting height typically ranges from 1.5 to 2.1 metres above the road surface, depending on the sign type and where you're mounting it. This height ensures visibility over most passenger vehicles while keeping signs low enough for easy maintenance.
Pole requirements depend on your sign size. While 36-inch signs can often use single-pole mounting, 48-inch signs typically need two poles for adequate stability when dealing with wind and vibration from passing traffic.
Here's a practical tip: plan your installation sequence to proceed from the termination area toward the advance warning area. This way, workers can install signs while protected by previously installed devices—a much safer approach than working your way into an unprotected area.
Maintenance checks should happen daily to ensure signs remain visible, properly positioned, and securely mounted. A fallen sign isn't just ineffective—it can become a hazard itself.
Timely removal of signs when work is complete prevents driver confusion and maintains the credibility of work zone signage. Nothing erodes driver trust faster than permanent-looking temporary signs.
Staying Compliant in Australia
Compliance with Australian Standards isn't a nice-to-have—it's essential for legal protection and worker safety. Non-compliant signage can result in significant fines and serious liability issues if incidents occur. The minimum penalty for speeding in work zones starts at $196, but the consequences of inadequate traffic control that contributes to incidents can be much more severe.
Traffic Management Plans (TMP) must be developed for most work zones and should specify the types, locations, and timing of all signage. These plans require approval from relevant authorities before implementation. Think of your TMP as the blueprint that shows authorities you've thought through every aspect of traffic management.
Local council requirements can add extra layers beyond national standards. A council might have specific requirements for sign placement on their roads, or additional approvals needed for certain types of work. Always check with local authorities before beginning your work zone setup—it's much easier to get it right the first time than to fix problems later.
Worker training in proper sign installation and maintenance is crucial. Your workers need to understand both the technical requirements and the safety implications of their work. A sign that's not properly secured or positioned correctly can compromise the entire traffic management system.
For more insights on workplace safety signage, explore our article: Workplace safety signs that speak louder than words.
Frequently Asked Questions about Work Zone Signage
What are the main components of a work zone?
Understanding the structure of a work zone helps you plan effective signage that protects workers and guides traffic safely. Every properly designed work zone consists of six distinct areas that work together as a complete system.
The Advance Warning Area is your first line of communication with drivers. This area provides early notification about upcoming work activities using signs like ROAD WORK AHEAD and DETOUR AHEAD. These signs need to be positioned far enough in advance to allow drivers to adjust their speed, increase following distances, and make informed route choices.
Next comes the Transition Area, which guides traffic from normal patterns into the work zone configuration. This is where you'll place lane closure signs, merge signs, and channelising devices that direct traffic around the work area. The transition area essentially acts as a funnel, safely moving traffic from multiple lanes into the available space.
The Activity Area encompasses both the buffer space and work space—two critical safety zones. The buffer provides a safety margin between active work and moving traffic, while the work space contains the actual construction or maintenance activities. Work zone signs in this area focus primarily on worker protection and may include variable message signs for changing conditions.
Finally, the Termination Area returns traffic to normal conditions with signs like END ROAD WORK and the systematic removal of temporary traffic control devices. This area is just as important as the others because it signals to drivers that work zone restrictions have ended.
Each area serves specific functions in the overall safety system, and skipping or poorly implementing any area can compromise the entire work zone's effectiveness.
How far in advance should work zone signs be placed?
The placement distance for work zone signs depends heavily on the road type and operating speed, but the underlying principle remains constant: drivers need adequate time to see, process, and respond to the information.
For urban low-speed roads operating at 50 km/h or less, advance warning signs typically need placement 100-200 metres before the work zone. This distance provides adequate reaction time for drivers in slower-moving traffic who have more time to observe and respond to signage.
Highway applications operating at 80 km/h and above require much greater distances—often up to 800 metres ahead of the work zone. Higher speeds create longer stopping distances and reduce the time drivers have to read and comprehend signage, making early warning essential.
The key is providing ample reaction time for drivers to complete a sequence of actions: recognise and read the sign, process the information, decide on appropriate action, and execute the required manoeuvre safely. Rushing any part of this sequence leads to sudden braking, aggressive lane changes, or other dangerous behaviours.
Hundreds of metres might seem excessive, but it's based on extensive research into human reaction times and vehicle dynamics. The goal is preventing rear-end collisions and maintaining smooth traffic flow, not just meeting minimum requirements.
Can I create my own work zone signs?
While the DIY approach might seem tempting for budget reasons, creating your own work zone signs is strongly discouraged due to strict compliance requirements that are difficult to meet without professional manufacturing equipment and expertise.
Australian Standards mandate precise specifications for colour, size, and reflectivity that go far beyond what appears obvious. The colour specifications must meet exact standards for both the orange background and black text or symbols. Even slight variations in colour can reduce visibility and driver recognition, potentially creating safety hazards.
Size requirements are based on extensive research into visibility distances and reading comprehension at various speeds. A sign that looks "big enough" may not provide adequate visibility at the distances required for safe driver response.
Reflectivity standards require specific grades of retroreflective sheeting applied using professional techniques and equipment. DIY application typically results in poor adhesion, premature failure, and reduced nighttime performance when visibility is most critical.
Beyond the technical challenges, professional manufacturing ensures compliance with all regulatory requirements while providing the durability needed for Australian conditions. The apparent cost savings of DIY signs are quickly offset by replacement needs, potential liability issues, and the risk of non-compliance penalties.
At Pinnacle Signage, we manufacture work zone signs that meet all Australian Standards while providing the durability and visibility your project demands. Our manufacturing process ensures consistent quality and compliance, giving you peace of mind that your signage will perform when it matters most.
Prioritising Safety with High-Quality Signage
When you're standing at the edge of a busy roadway, watching traffic speed past your work zone, the importance of quality work zone signs becomes crystal clear. These aren't just orange pieces of metal—they're the critical communication link between your team's safety and the drivers who need to steer around your work area.
Throughout this guide, we've explored how every element of work zone signage works together to create an effective safety system. The high-visibility orange colour that catches drivers' attention, the reflective sheeting that ensures visibility at night, and the durable aluminium construction that withstands Australia's harsh conditions—each component plays a vital role in protecting lives.
Quality materials form the foundation of effective signage. That 2mm aluminium substrate isn't just about durability—it's about ensuring your signs remain upright and visible throughout the entire project duration. When paired with high-grade reflective sheeting, these materials create signs that perform reliably in everything from scorching Queensland summers to Melbourne's unpredictable weather.
Compliance with Australian Standards isn't bureaucratic red tape—it's a carefully developed system that ensures consistency across the country. When drivers see your work zone signs, they need to instantly understand what's expected of them. This universal language of traffic control only works when everyone follows the same rules.
Strategic placement transforms individual signs into a comprehensive communication system. The advance warning that gives drivers time to slow down, the transition guidance that helps them merge safely, and the clear termination that signals normal conditions have returned—this sequence guides drivers through your work zone with confidence.
At Pinnacle Signage, we've seen how proper signage can transform a potentially dangerous situation into a smoothly operating work zone. Our team understands that behind every sign specification is a real person trying to get home safely at the end of their shift.
Whether you're managing a weekend utility repair or a months-long highway upgrade, the principles remain the same. Professional manufacturing ensures your signs meet all regulatory requirements while providing the visibility and durability your project demands. It's not worth risking worker safety or project delays to save a few dollars on inferior signage.
The difference between a safe work zone and a dangerous one often comes down to the quality of the signage. Don't compromise when lives are at stake—choose signage that's built to protect, built to last, and built to Australian Standards.
For comprehensive information about workplace safety signage solutions, read our detailed guide: Making your workplace safe and secure with high-quality safety signage.
Ready to discuss your work zone signage requirements? Contact our team to learn how Pinnacle Signage can provide the compliant, durable signs your project needs to operate safely and efficiently.